Tuesday, May 31, 2011

Chocolate Profile

When accenting a small thing like a petits four or especially a tartlet with a garnish you need to be more aware of the flavour profile for each item you are putting into the small dessert. Chocolate has a very different profile depending on the percentage of cocoa butter in the commercial product. We did a slight taste comparison so I am going to give a few notes on a few different kind of chocolate to help illustrate this idea.

58% cocoa nibs - have a slight bitter taste, but is mostly sweet and creamy. Very reminiscent of what we think of as "good" chocolate.
64% Manjari - From the Valrhona chocolate company, this chocolate is a single origin product. Single origin means it is all harvested from one terroir. This chocolate had a complex fruity taste that started with a deep berry taste and then finished with a citrusy finish. This chocolate would be a good pairing with a fruit dessert to bring out or mimic that flavour without infusing.
72% Araguani - This is also from the Valrhona company. It has a bitter, dry, reminiscent of coffee, tannic flavour. This is what we are more accustomed to call bakers chocolate or unsweetened chocolate. But because of the single origin quality you can pull on more earthy flavours then is usually present in commercial unsweetened chocolates.

http://www.valrhona.com/

Fruit Tartlets

This is just a little description of different types of fruit tarts and tartlets that you can make in several different categories with common fillings and garnishes that are appropriate for that category.


Fresh Fruit Tartlets: always need to be glazed!
  • Trimmed fruit
  • Fruit salad
  • Flavoured or infused pastry cream
  • Crème diplomat
  • Candied herbs


Curd Tartlets: garnishes below...

  • Fresh fruit (glazed)
  • Italian meringue
  • Citrus chips (in small pieces!)
  • Candied flowers
  • Candied zest
  • Jam


Cooked Fruit Tartlets: with frangipane
  • Jam
  • Streusel
  • Almond cream

Custard Tartlets: filling is cooked in a blind baked crust, baked 300° until set. Sets much quicker then full custards. This is the category for a crème brûlée tartlet or pumpkin pie tartlet.


Poached Pears

Poaching something means to cook an object to 160° - 180°F in a flavourful liquid. Essentially you are infusing and simultaneously softening an object by simmering it in a liquid. Pears are good candidates for this because they will not loose its shape when left in liquid for a long time, rhubarb is also often poached as it is another good candidate for poaching.

Things that are often used to infused a poached item in a sweet application are: cinnamon, nutmeg (has a very strong flavour), cloves (strong), lavender (strong), syrups, wine, herbs, chamomille, mint (turns black when cooked), spices, peppercorn, rosemary, etc.

White or red wine can be used. You need to be careful about the flavour profile and the aesthetic choice between white or red wine. Aesthetics: if you use a red wine then the colour will bleed into the object which you can control by making choices over things like poaching the fruit whole or sliced. Whole fruits will seep colours in at a slower rate then sliced items. Flavour profile: if you use box wine it will taste like box wine (pretty much sums it up). Zinfandel, cabernet sauvignon, and syrah are good reds to use. Riesling, sauvignon blanc, and gewurztraminer are good choices for white wines.


Formula:
6 pears, whole and peeled
1# sugar
1 pt. wine
2 pt. water


MOP: takes roughly 40 min.

  • Bring sugar, wine, and water to boil in a large pot
  • While this is heating up, peel pears. Slice and core if you decide you want that aesthetic.
  • Reduce sugar mixture when it reaches a boil (between 160° - 180°F). Place pears into the pot.
  • Cover with a parchment circle and a plate (or if you have a top to the pot you can use that too) so that the pears and liquid do not escape and do not oxidize it is also so that the pears stay fully submerged.
  • Cook pears until tender, check with a knife when the knife easily breaks the surface remove from heat.
  • Cool to room temperature and then refrigerate overnight. If you do not cool the liquid then the alcohol aroma will seep into other products in your store room, it is very strong.

Monday, May 30, 2011

Turtle Tartlet

This is a elegant take on a simple homey dessert. The beauty of calling something turtle is that most Americans know exactly what they are eating even if its dressed up inside of a pink coloured sugar ball.


MOP:

  • Roast pecans in the oven until a slight aroma comes out from the nuts. Cool.
  • Pre bake tartlet shells with desired pastry dough.
  • Let cool before filling.
  • Fill bottom of the cooled shells sparingly with cooled roasted nuts.
  • Fill a squirt bottle with caramel sauce. Angle at 90° and squirt the caramel into the shell just under the rim.
  • Let the caramel sauce set.
  • Pour in ganache with a squirt bottle on top of the caramel sauce, revealing the caramel.
  • Let set up before garnishing.
  • Garnish the tartlet in the center with a caramelized or candied pecan.

Chocolate Crémeux Tartlet

This tartlet is a very delicate and rich little shell. It is definately good that it is a one or two bite-er because the crémeux is so rich, but in this make up that richness is accentuated the the gold leaf garnishing.


MOP:

  • Pre bake tartlet shells with desired pastry dough
  • Let cool before filling.
  • Melt chocolate and paint a thin layer of chocolate on the inside of the dough as a barrier against the moisture of the crémeux.
  • Re heat the crémeux over a double broiler if its solidified. You want the crémeux to be pourable, between 70° - 90°F.
  • Knock out air bubbles if any form.
  • Pipe in the crémeux starting at the corners and into the center to make it look uniform.
  • Let the crémeux set before garnishing.
  • Garnish with a small amount of gold leaf. Apply with a brush.

Tartlet Shells

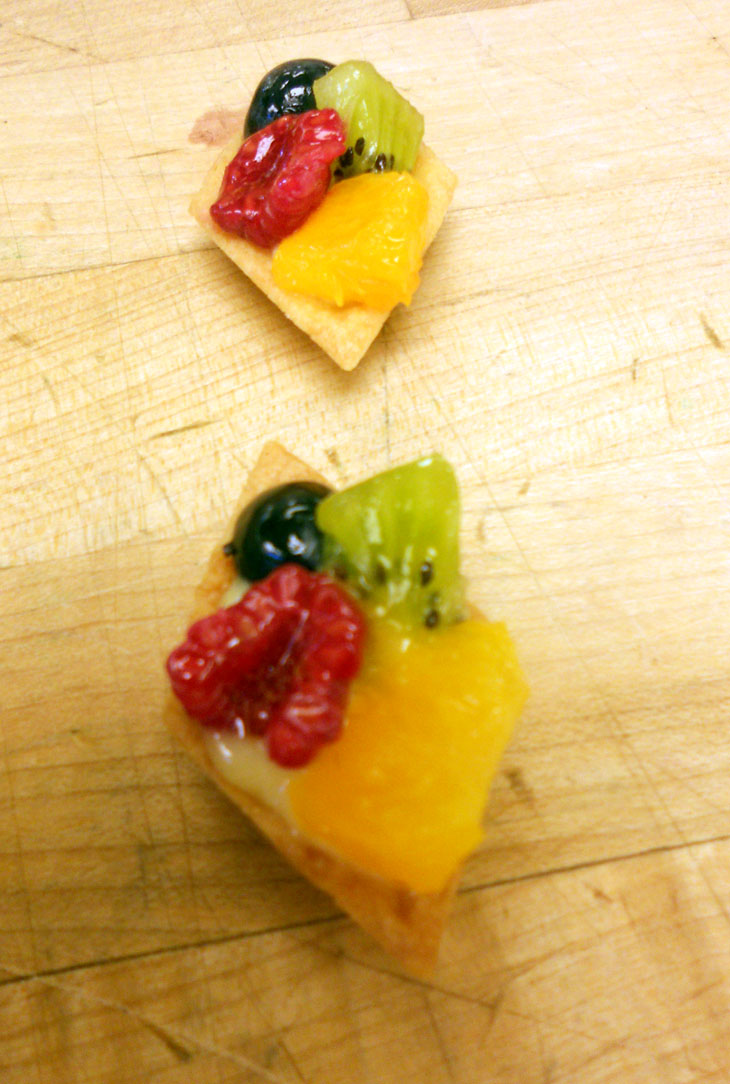
Tartlets are just like they sound, smaller tarts.  You can fill tartlets with pretty much anything you can think of, keeping in mind that it is a very small item that can only pack so much inside of the shells. Essentially a tartlet consists of a crust, a filling, and a garnish. Below some variations are detailed, Chocolate Crémeux Tartlet and a Turtle Tartlet. There is also a brief description of many variations that you can use.


Crust: pâte sucrée (chocolate/vanilla/nut meal), pâte sablée, pâte à foncer (for more savoury fillings), linzer
Fillings: there are two loose categories for this, although some cross over slightly
   Baked: almond cream, frangipane, custard (pot du crème / crème brûlée)
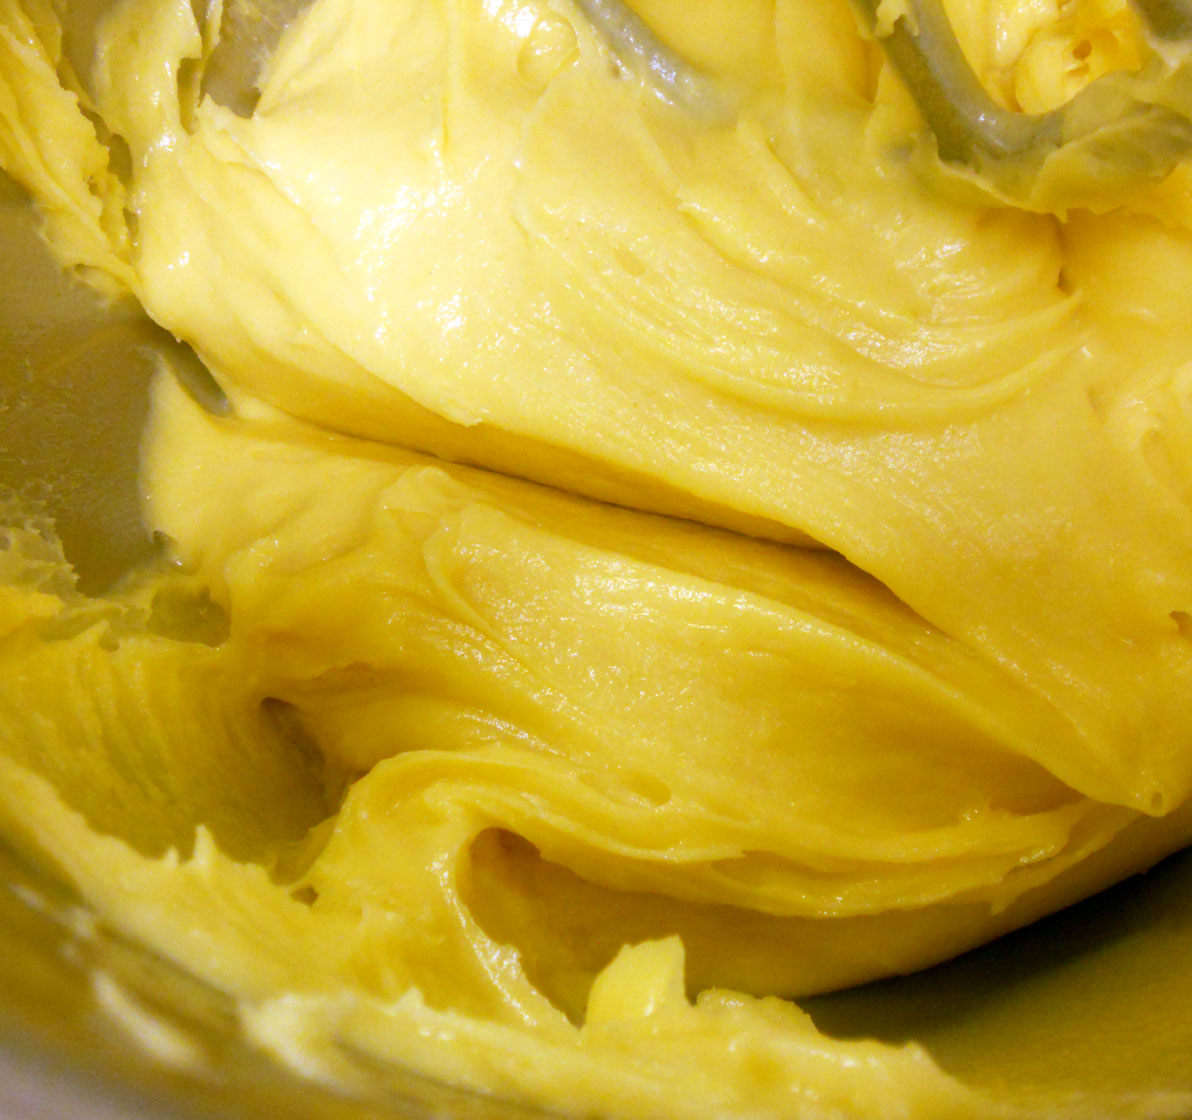
   Unbaked (cooked): mousse, crémeux, curd, pastry cream, caramel filling, chiffon filling, bavarian,
                                  cooked fruit (this can be for baked applications as well)
Garnish: two different loose categories for this too. The accent just tells the story while the feature is the center of the dessert.
   Feature: Italian meringue, fresh fruit (can be accent), ganache (can be accent), geleé (can be accent)
   Accent: candied zest, citrus chips, appricot glaze, chocolate decos, chocolate curls, fine line piping,
                roasted/candied nuts, gold leaf, silver leaf, edible flowers, herbs


Chef Kelson demonstration cutting.
MOP: tartlet shells.
Time: 24 shells takes roughly 40 minutes to mold
  • Cut off a small portion of the dough and reserve the rest of the dough, wrapped, in the refrigerator.
  • Roll out dough as thin as possible to roughly 1/16" thick, almost transparently thin.
  • You can either do the next step individually or for a few molds at a time. If doing multiple shells, note that the finish might not be as refined, but it will be faster. Cut out a strip of the dough and place it over a few molds (silicone). Cut around each mold. Press the dough down into each individual molds either with your fingers or with a tamper. You can wrap extra dough in plastic and use this to press the dough into the corners.
  • Trim edges.
  • If you are using a metal mold you can still do this in production method. Place several molds close together leaving a slight gap between each. Reserve one mold to use as tamper if you dont have one. Place strip of dough over molds, tamper dough into the molds. Cut around each mold releasing them. Press in corners as done with the silicone molds. Trim the edges down.
  • Par bake tartlet shells fully. Bake at 375°F for roughly 15 minutes, or until it takes on golden colour.

Candied Flowers

Candied flowers can hold up for a long time. When making them you want to make sure you are choosing edible flowers though and sample the taste of the flowers because some flowers do have a stronger flavour then other ones, and it might translate slightly even after you've candied it. I decided to use a vanilla sugar to coat my flowers because I figured the additional flavour would benefit the tartness of the flowers, and I figured that the specks you get in a vanilla sugar would not detract from the natural aesthetic of the flowers. Before using the flowers, like fruits, they should be kept under refrigeration in a air tight container to prevent them from wilting.


Formula:
Flower stems
Vanilla sugar
Egg whites


MOP:

  • Peel aesthetically pleasing pedals off of the flower buds. 
  • Brush the pedals individually and gently with egg whites on both sides.
  • Place pedals in sugar, cover both sides.
  • Continue with all the flowers.
  • Move flowers onto parchment lined sheet pan if you run out of space, you can keep flowers in sugar until ready to use without worrying about drying it out too much.


Edible Flowers:
Micro Orchid
Pansy
Sparkler Tops 
Lavender


Caramelized and Candied Nuts

This is the same process for candying and caramelizing any nuts. Both of the processes make perfect value added products especially for the holiday season. This one is demonstrated with pecans.


MOP:

  • Roast 4 cups of pecans spread out evenly on a half sheet pan until the aroma is drawn from the nuts, takes approximately 5-10 minutes depending on the oven temperature. Let cool.
  • Bring 1/2 cup sugar with just enough water to cover/make sandy, to soft ball (when its at a rolling boil will also do).
  • Add nuts in. Stir to coat evenly. Continue stirring until the sugar seizes up. If you want, you can add salt at this point, it helps the flavour if you are using the nuts in a sweet dough application).
  • Remove from stove and spread flat on a parchment lined sheet pan for candied nuts.
  • For Caramelized nuts, continue to stir the nuts until the sugar re-liquifies. It will take on a caramelized colour.
  • Spread the nuts quickly and thinly on a parchment lined sheet pan. It will be a little more difficult to do when its caramelized, but it is more essential for application of the caramelized nuts.
  • Cool completely before eating. The nuts will retain heat after the candied sugar or caramelized sugar cools.

Pistachio Flour

You can make pretty much any kind of flour you want from any kind of solid object. You can easily make a flour by just pulsing the ingredient in a food processor, but sometimes depending on the fat content of the object this will make the flour too moist.

TPT (tant pour tant - part for part)
This method uses equal parts of ingredients to enhance the outcome of the final product by drawing form strengths of each ingredient. In the case of nut flours, almonds are high in fat so if you use equal parts confectioners sugar when making almond flour then the starches from the 10x sugar (10x refers to the grain of the confectioners sugar) then it will help dry out the fats as the almonds are pulsed.


Almond Flour - equal parts almonds and confectioners sugar. Sift the confectioners sugar. Pulse the almonds and confectioners sugar in a food processor until small flour sized bits form. Sift the mixture, return the large bits to the food processor. Continue in this manner until the chunks start to take on an oil or moist texture.

Pistachio - they are lower in fat then almonds so you can just pulse the pistachio in sections, like above, with or without the confectioners sugar.


The following information is from www.nutritiondata.com
High to low fat nuts (unsweetened, per cup): 
macadamia nuts (76g), pecans (72g),  pine nuts (68g), brazilnuts (66g), walnuts (65g), hazelnuts (61g), sesame (61g), sunflower seeds (57g),  cashew (48g), pumpkin seeds (46g), pistachio (44g), flaxseed (42g), coconut (33g), acorns (31g)


This the the left over bits once the flour has been sifted out.
It can now be returned to the robot coupe to be processed again.
This is a progression of pistachio flour. The flour to the left is 1pt 10x and 1pt pistachios.
The middle flour has been processed through a second time.
The flour to the right is straight pistachio flour without any confectioners sugar.

Tempering Chocolate


Tempering Chocolate (decorations)

Tempering chocolate is difficult because the chocolate needs to be between 86° - and 89° F otherwise it will not hold a shape or transfer long enough to be used as decoration. 


MOP: Seeping
·      Scale an amount of chocolate for tempering. Scale three times the amount of chocolate for a base. You want to use a chocolate that is high in cocoa and not in milk fats. The higher the percentage the better, using something that is 64% is ideal but you can go down to 54% and still have it work.
·      Melt the larger portion of chocolate over a double broiler. Heat to 115°F.
·      Remove from heat and temper in the smaller portion of chocolate a little bit at a time.
·      Cool the chocolate to somewhere between 86°- and 89° F. If the temperature of the chocolate gets cooler then this then you will have to re heat and re temper the chocolate.

Candied Zest

This is a simple and small sized garnish that you can place on a petits four that will give it additional height and dimension without unbalancing the pastry item.


MOP: lemon zest

  • Peel a lemon only peeling off the zest, do not keep any of the pith.
  • Slice the zest strips into smaller slices, about 1 mm wide.
  • Cook zest in water, bring it to a boil.
  • Drain the liquid from the pot.
  • Fill pot to cover with simple syrup, let this cook until the liquid turns yellow.
  • Strain the liquid and repeat two more times.
  • Drain the liquid and remove the zest. 
  • Toss zest in sugar to dry out. Let sit for at least 20 minutes, or until dry.
  • Remove from sugar. 
  • Use until brittle, usually is good for 3-4 days.

Choux make ups

Here are a few different things you can do with pâte a choux paste. When we think of pâte a choux, we usually think of eclairs filled with pastry cream and garnished with a nice shinny ganache with a little bit of white chocolate drizzled on top. And while that is pictured below, there are other things you can do with it.


Eclair (Fr. lightning bolt):
    Use an 804 tip
    Filled: pastry cream
    Glazed: ganache / stringing fondant / melted chocolate
    Variations: if you use a more savoury paste you can easily fill this shape with a savoury creamed item.


Cream Puffs:
   Use an 804 tip
   Filled: pastry cream, whipped cream
   Glazed: confectioners sugar, caramel
   Note: Croquembouche is a common usage for cream puffs that are dipped in caramel and then stacked on top of each other in a triangle shape.


Swans:
   Use an 826 tip, cone (or #4) tip
   Filled: whipped cream
   Glazed: confectioners sugar
   Note: this shape requires some assembly, but the cute factor that is achieved is quite worth the small amount of effort and time.


La Religieuse (Fr.  woman belonging to a religious order)
   Assembly: two different sized cream puffs, filled, the larger one dipped in chocolate and the smaller one dipped in stringing fondant. The assembly is supposed to mimic the image of a nun.
   Filled: pastry cream
   Glazed: ganach, stringing fondant


Paris-Brest: this shape was made to commemorate a bike race, it is supposed to look like a fast moving bicycle wheel.
     Use a 826 tip
     Filled: hazelnut pastry cream*
     Glazed: roasted almonds, confectioners sugar
*take about 2 T of hazelnut praline paste and 8 oz. of pastry cream and mix together. Add butter to the mixer until the mixture is about the consistency of buttercream. The butter allows the pastry cream to stabilize better since it is open to air and holds up without forming a crust.


Gâteaux St. Honoré:
This is a cake that we made in basic cake decorating. It was made in honor of the French patron saint for pastry chefs and bakers. It is a series of cream and cream puffs on top of a bed of puff pastry. And it resembles a crown when its finished.
    Filled:  crème chiboust ( pastry cream + gelatin + whipped cream)
    Glazed: caramel cage


Pête De Nonnes (Fr. nuns fart)
    Use an 804 tip
    MOP: pipe round oval shapes, about the size of a cream puff, into a fryer
    Glazed: confectioners sugar


Churros
    Use an 826 tip
    MOP: pipe star shaped sticks into the fryer
    Glazed: cinnamon and sugar


Gougère: 
    A savoury cream puff, usually has Gruyère cheese added to the choux pastry or is filled with the cheese.


Profiterole (choux à la crème)
   Use: 804 tip
   Filled:  ice cream
   Glazed: chocolate

Palmier

This is a traditional French dessert that resembles the American Elephant Ear. It is a very simple pastry to shape, and is a very yummy pastry to eat. It also holds up well to time and weather. So is a good stable choice for something like a sweet table. The basic shape could be modified to create a new pastry of your choosing, but it turns out like a little heart which is really rather nice.


Formula: yields approximately 30 palmier
12" wide strip of puff pastry
8 oz. granulated sugar
8 oz. confectioners sugar


MOP:

  • Sift together confectioners sugar and granulated sugar. Set aside.
  • Take a 12" wide section of puff pastry dough, the length does not really matter but determines how many pieces you can get.
  • Lay dough flat and dust heavily with sugar, rubbing the sugar in with your hands to create a velvety texture.
  • Flip the dough over to dust the other side in the same manner.
  • Flip the dough back over and dust if needed, sometimes the sugar falls off while changing sides. If the weather is very dry out, like in the winter, you can paint the dough sparingly with water to help the sugar mixture adhere to the dough. Trim down edges if you have not done so already.
  • Fold in dough, 1 1/2" on both sides.
  • Fold in again to the center, on both sides.
  • Fold dough over on it self at the center. You should have a thick booklet with several folds on both sides of the middle.
  • Cut off one end, and then cut across at 1/4" increments.
  • Lay each section flat on the parchment folds facing up. It should resemble a heart. Give ample amount of spacing between each section, this will allow for better air flow and expansion.
  • Bake at 400°F on a rack until the bottoms have caramelized. Flip each palmier over and bake for another 30 seconds to aide in colouring.

Pastry Cream

The percentages here are a good guide for a basic pastry cream.

This formula is adapted from the Michel Suas Book Advanced Bread and Pastry, A Professional Approach, Pg. 622
Formula: yields one quarter sheet pan
100%           Whole milk           16 oz.
12.5%          Sugar                    2 oz.
7.8%            Cornstarch            1 1/4 oz.
12.5%          Sugar                    2 oz.
12.5%          Egg                       2 oz.
9%              Egg yolks               1.5 oz.
Total: 154.3%


MOP:
·      Scale milk and the smaller portion of sugar in a sauce pot, bring to a boil.
·      While this is heating mix the cornstarch, larger portion of sugar, egg yolks together.
·      Temper the milk into the egg yolks when it comes to a boil.
·      Bring this portion back into the pot and heat, stirring constantly until it starts to boil, it will make a few bubbles. Like the reverse of listening for popcorn on the stove.
·      Take off heat and add butter in small bits, add each new bit after the previous has been absorbed.
·      Quickly chill by spreading on a sheet pan or over an ice bath.
·      Cover and refrigerate until needed.

Caramel Sauce


Traditional caramel can be made by cooking sugar in a little bit of water, just enough to wet the sugar to sandy consistency, until it forms an amber colour. Liquid caramel is often used for the turtles dessert (chocolate, caramel, pecans). It can be used for many applications though since it is just a smoother more caramel with volume to it.


Formula: yields about one squirt bottle
10 oz. Sugar
2 oz. Glucose
4 oz. Butter, room temperature
5 oz. Cream


MOP:
  • Cook sugar and glucose to soft ball (320°F). Sugars should take on a robust colour.
  • Off heat, whisk in warmed cream (if the cream is cold the mixture will have temperature shock and seize up) and the softened butter.

Pâte a Choux

Pâte a choux is a dough that is light and rich at the same time. The primary ingredients are some kind of liquid, fat, flour, and eggs. Liquid is usually milk or water or a combination of both. Fat is usually butter. The product is physically leavened by the steam in the milk and eggs. This batter can be made in advanced and then kept for a few days before needing to be piped. The batter, though, needs to be piped and baked day of. If you want to make this ahead of time you can also pipe the batter, bake it, and then freeze the unfilled shells until time of use. When you want to use the shells, flash them in the oven, and then cool before filling.


Formula: yields approximately 20 eclairs, 30 cream puffs, 20 swans, 30 swan necks.
125% Eggs, 342 g
75% Milk, 205 g
75% Water, 205 g
75% Butter, diced, 205 g
100% Bread flour, 274 g
1-2% Salt, 3 g
5% Sugar*, 14 g
Total: 331%, 2#


*optional. Depending on whether the filling is savoury or sweet.


MOP:

  • Bring liquid, fat, sugar, and salt to a boil.
  • When the liquids boil add flour, off of heat, whisk in carefully so you incorporate all the flour.  
  • Bring it back to the heat. On high heat, use a wooden spoon and continuously stir the "ball" until a film is formed on the bottom of the pan. Move the ball around the pan and down so that the entire mixture is getting cooked. Be aware that the longer its cooked the more flavour will be extracted but the longer it cooks the more eggs you will need to hydrate the "ball".
  • When that film has formed transfer the "bread ball" to a mixing bowl. Start mixing it on a low speed. Add eggs in one by one. Make sure that you whisk the eggs together so that you are incorporating whole eggs. After you add the first egg you will see the mixture separate, when it comes back together around the paddle add your next egg. Watch the mixture and scrape down the bowl as needed.
  • When you have added most of your eggs test the batter for doneness. The dough should feel like a thick custard, a little firmer then a cake batter but not as thick as a cookie batter. You want to test the dough for doneness. There are three common tests that are used:
    • Finger test: you should be able to easily pull the batter between your thumb and first finger forming either an hour glass shape, or stalagtites and stalagmites. Not always reliable depending on the speed you pull your fingers apart with.
    • Curl test: if you turn over the batter it should hold a curl, this technique is similar to finding a stiff peak for whipping cream.
    • Trough test: smooth out the surface of the batter in the bowl. Draw your finger through the batter quickly, and it should hold a line while the sides slightly curl inwards.


  • If you are not piping immediately wrap the pâte à choux with plastic, letting the plastic touch the top of the pâte à choux so a crust does not form. Can be stored up to an hour before piping.

Thursday, May 26, 2011

Bouchee and Fruit Strips

This is a play on what we normally picture when the word fruit tart is said. This is essentially the same thing: a pastry dough base, a cream filling, fruit garnish, glaze on top. But in both of these make ups the base is puff pastry which gives this dessert a really interesting height and texture to the one or two bite dessert.


Formula: yields approximately 16-20 bouchee
1# puff pastry dough, approximately (you need a 8" x roughly 8" rectangle)
1# pastry cream
8 oz. whipped cream
Assorted fruit (and nuts)
Shavings: nut flour/coconut shreds/chocolate shavings, etc.
Apricot glaze


Bouchee
MOP:

  • Take rested puff pastry out from the refrigerator, cut an 8" strip from the dough. Sheet out the dough slightly.
  • Cut the dough in half to get two equal pieces.
  • Dock one half of the dough and set aside.
  • Use your 2" cutter to score circles across the sheet. Place the circles close together with minimal waste between each scored circle.
  • Use a 1/2" cutter to cut out a smaller circle in the center of each scored circle.
  • Egg wash the docked sheet. 
  • Gently lift the other sheet up and place it on top of the docked sheet.
  • Cut out the 2" circles. This will help to seal the two layers together. 
  • When the pieces are cut out then use the back of a pairing knife to flute (binds) the outside of the circle. This step not only textures the puff a little bit but it helps to hide any imperfections you might have gotten with the cutter. It also helps seal together both layers just a little bit more.
  • Egg wash the tops and place a clean sheet of parchment on top. Press down slightly so that the layer sticks. The parchment on top helps create an even vertical rise during baking.
  • Refrigerate to allow the gluten to relax before baking. This step is a luxury that helps the product but is not necessary, so there is no given time. Even 5 minutes would help the dough.
  • Bake at 375°F (375°-400°) until caramelized on the bottom.
  • Cool before filling.


Fruit Strips
MOP:
  • Cut off a 3" strip from the puff dough.
  • From this 3" strip cut one 2" strip and divide the rest in half (should get approximately two 1" strips).
  • Dock the 2" strip, egg wash.
  • Place each 1" strip on either side of the 2" strip. Creating a rail appearance.
  • Egg wash the top of the pastry. Place a parchment sheet on top and gently press down.
  • Refrigerate before baking.
  • Bake at 375°F until caramelized on the bottom.
  • Cool before filling.


Finishing: this is just one general method for filling both the bouchee and fruit strips.
  • Press down the center of the puffs slightly. Cut the fruit strip down into small rectangles roughly 1 1/2" x 2"
  • Dip the hallowed top side in apricot glaze, and immediately dip in desired shavings.
  • Set the pastry down so that the hallow is facing up. Fill this hallowed hole almost to the top with creme diplomat (1 pt pastry cream to 1 pt whipped cream)
  • Arrange Fruit on top of the creme, hiding it mostly.
  • Glaze fresh fruit.
 

Cheesecake

There are different kinds of cheesecake: 

  • New York style (east coast style), this ever popular American staple desert usually is heavy in cream and eggs. 
  • West Coast, usually sour cream is folded in to the batter. Sometimes it also is set on top as a second layer, so that the cake is partially baked and then is allowed to finish baking with the contrasting sour cream layer.
  • French cheesecake, is made with the usual creaming method by has a meringue base that is folded in to make it lighter yet still creamy.
  • Italian cheesecake, is made with ricotta cheese instead of cream cheese.


There are several variations that can be done with cheesecake, here are some suggestions for how you can make substitute things for a less traditional cheesecake:


  • Crust: Nougatine, brittle
  • More savory cheese options: blue cheese, goat cheese
  • Sweet cheese options and substitutes: tofu (low fat, vegan option), cottage cheese, mascarpone, neuf châtel (fresher, less processed cream cheese), fomage blanc (fresh cheese, un-aged, low fat option), ricotta, bakers cheese, quart (essentially bakers cheese)
  • No bake: gelatin can set the cheese, making it more of a mousse type dessert


This formula is similar to the brownie formula where it yields a richer product then you are usually accustomed to. Because of that it is a perfect recipe for petits fours demi-sec or petits fours frais.


Formula: yields a quarter pan
Cream cheese, 455 g
Eggs, 3 each
Egg yolks, 1.5 each
Bread Flour, 20 g
Sugar, 188 g
Vanilla, 23 g
Heavy cream, 23 ml (1.5 T)
Optional*
Sour cream, 225 ml


* Optional Variations:
Lime: 63 g lime juice, 8 g grated lime
Amaretto: 88 g almond paste, 113 ml ameretto
Marbled: 88 g melted dark chocolate mixed into 1/3 of the plain batter. If you do not mix it into enough of the batter it will not marble correctly, the chocolate will harden on you.
Eggnog: 20 g rum, 11 g brandy, 1.5 g nutmeg
Hazelnut: 20 g praline paste, 43 g frangelico


MOP: Creaming method
  • Cream room temperature cream cheese with a paddle attachment to soften it to a creamy consistency.
  • Add the butter and sugar in and cream until smooth. Scrape down bowl as needed so sugar and butter lumps do not hide in the bottom of the bowl and get picked up later.
  • Add in eggs in stages. Mix until the batter forms a creamy consistency without any lumps. You might need to scrape down the bowl as it mixes.
  • When the batter is smooth add in vanilla, heavy cream, sour cream, and flavour variation if you are doing a full inclusion. Blend in.
  • If you are doing a partial inclusion, pour 2/3 of the batter into a prepped mold or sheet pan with a blind baked, dry and cooled crust.
  • Mix the remaining 1/3 of the batter with the inclusion. Pipe this in to create a marbled or feathered texture on the surface. You can also easily do leafs, or dots, or any other kind of elegant design that you determine appropriate.
  • Bake below 350°F without a water bath. We baked it at 250°F in a deck oven for approximately 20-25 minutes. Until the center is firm and the cheesecake jiggles slightly.
  • Cool before refrigerating.


Finishing:
Wait until the cheesecake is firm before cutting. You can get really clean cuts with hot water and a frozen cheesecake, its just a little harder to cut through a crust with a flimsy cutter when its frozen.
  • Use an appropriate sized cutter for your application. For a demi-sec dessert, a 2" circle cutter works really well, or 1 1/2" squares also give a really elegant looking shape for a two bite dessert.
  • Dip the cutter in hot water to warm, clean off with a clean town and cut out the cheesecake cleanly.
  • You can garnish however you want, here are a few suggestions. Dust the sides with small chocolate shavings (using a cheese grater gives you a really nice small shaving size, make sure to use gloves when applying the chocolate so your hands do not melt the chocolate). Fresh fruit that is anchored by a whipped cream or chocolate ganache rosette is a pretty touch, make sure to glaze fresh fruit. A small tuile cookie is also a pleasant option, as is chocolate cigarettes.