Thursday, February 16, 2012

Wedding Cakes: gum paste bases and royal icing piping

Today I start 13 days of a Wedding Cakes class. I have to admit that since my heart is still in breads, and now a little bit more in chocolates that I was not looking forward to this class. But on the first day we learned this technique that I absolutely fell in love with because it reminded me of some of the techniques that are used in oil painting. The first day was just an easy introduction to what we are going to cover, and then prepping bases for gum paste flowers which we will produce the next day in class, and practicing piping techniques with royal icing.

Gum paste. Is pretty much like a stiff play-dough material that gets harder when you let it set uncovered (also very much like play-dough). Its really great for sculpting, when we did gummies in the Chocolates and Confections class we were able to mold things like worms or bears or other 3D shapes if we chose to.


We prepped bases out of gum paste for roses and calla lilies.  The calla lilies are pretty straight forward to make because the base is just the yellow baby corn looking spadix in the center. You want to tint your gum paste with yellow colouring. I used one drop (you could maybe use two drops) of an oil based food colouring to a fist full of gum paste. You then want to kneed it together with gloved hands until the colour is fully distributed. The motion is going to resemble kneading dough or pulling taffy.

The three different sizes of rose bases
are shown with the calla lily spadix.
Cut a 5-6" piece of 18 or 20 gauge floral wire. The wire needs to be floral wire that is a green colour. To make the base, roll out a round tube shape and elongate it so that the width is very narrow. Dip the wire in gum paste glue or egg whites, push the gum paste onto the wire about 2/3rd of the way so that the spadix stays straight when you hold the wire up. Continue to roll the gum paste so that it is approximately 2 1/2" in length and about 1/4" thick. Dip the gum paste in the egg whites, and then roll it in corn meal (semolina works too) clean off excess. Stick the finished base in a styrofoam block so that it can set.


Rose bases can be made for full blooms, half blooms, and for buds. The process is the same, but the sizes  are going to range from skinny Hershey Kiss size to candy corn size.

The process is to use an 18 or 20 gauge floral wire (22 gauge for the rose buds). Make a hook at one end of the 6" wire, the hook is to help give a stronger base for the gum paste to attach to since it will become heavy as more petals are added to the rose shape. Form a ball out of the gum pate (for the full bloom the ball will be slightly smaller then a 25 cent gum ball, for the bud the size of a marble). Pinch one end of the ball to make a cone. Dip the floral wire in egg whites, and push this into the gum paste. Pinch the fat end of the gum paste so that it adheres to the wire, if the gum paste gets sticky you can use cornstarch on your hands to keep it dry.


Showing the ball next to the
finished rose bud base.


For piping we practiced cornelli's, brushed embroidery, piped embroidery, string work/extension work, borders, and dotted swiss. For the practicing, we made individual batches of royal icing. This size is good for practice work or small amounts of piping.

16 oz.   Confectioners sugar, 10x, sifted
3 oz.     Egg whites
1/4 t.    Cream of tartar

MOP: with a paddle attachment mix all ingredient to incorporation on low. Increase speed to moderate speed and let mix for approximately 7 minutes, until the icing is of toothpaste consistency.  Cover immediately with plastic to the surface and then a damp cloth on top of the plastic.

Cornelli Lace
Royal icing is a quick drying, firm icing that works really well with fondant cakes. Not all techniques we covered today so below will just be a brief over view.

Cornelli Lace:
use a #0 or #1 round tip
This type of shape is very traditional. It essentially is like making a lot of cursive "e", "m", and "w" shapes connected together to make a fine line squiggle design.

Some examples of Chef's Piped Embroidery

Piped Embroidery:
use a #00, #0, or #1 round tip
This time is a free form type of piping where you are trying to mimic embroidery or needle point work with a very fine tip.

Brushed Embroidery:
use a #1 round tip
This technique produces a very organic lacy design that can be carried out in clumps or along the whole cake. This technique needs egg whites and a fine tooth brush. You will need to start with piping a organ shaped heart. Then dip the brush in egg whites and brush in against the piped icing. Pipe another shape and immediately brush the piped line in again. Continue in this manner, piping a new shape next to the last one.
String work along the sides,
brushed embroidery on the top.


String Work / Extensions:
use a #0 or #1 round tip
Extensions are really not used a lot in the US but are piping bridges, built up dimensionally so you can pip extensions from the bridge to a platform. String work is where you pipe a dot on the cake, and while applying pressure pull out from the cake and let the icing fall naturally giving a cup shape before you bring the tip back to the cake. Creating a clean and even drop like laced strings.

Dotted Swiss:
use a #2 or #3 round tip
This style is creating offset ordered dots along the sides of your cake. You can determine the spacing or number of dots used in a cluster. The important thing to remember is the second row of dots is offset from the first, and even and odd number rows match up. The important thing to remember with this technique is to not leave tips on your dots, soften each dot immediately with egg whites to create a smooth professional looking finish instead of Hershey Kiss like tips.

Borders:
use a #5 or #8 round tip/star tip
Teardrop/Pear/Bead - you can either link them together or pipe each bead individually
Shells/Scrolls - use a star tip to create a seamless effect
Reverse Rosette - use a star tip, pipe tight cursive "e" then an "a"

Reverse Rosettes
Scrolls
Shells

String work, cornelli lace on top


Teardrop/pearl/bead
L: individually piped
R: strung together

Chocolates Final

I got a little relaxed on updating the blog as finals for my chocolate class approached. So instead of adding a few of the missed items that we covered in the last few days of class; gummies, pate de fruit, pb&j chocolates I am going to put up pictures what we covered on the final.

We had to make 50 of the penuche, or another fudge product.
We also had to make 50 crystalline products and I chose to re-make Nougat Montelimar (the white candies wrapped)
In the top right corner is 30 pieces of dipped PB&J confections.

Pate de Fruit is a flavoured gummy that is coated with a light dusting of sugar. For both the in class exercise and the final I chose to use an apple puree because I liked the light aesthetic of apple puree when dusted in sugar. I also quite liked the natural taste of the puree.


Nougat Montelimar is a nougat confection packed with almonds, pistachios, hazelnuts, dried pears, dried apricot, and dried cherries. It has a very high percentage of almonds because it comes from a region in France that is known for growing almonds.


  PB&J confections are equally delicious because it has an equal layer of peanut butter ganache and a raspberry pate de fruit. The combination of jelly and smooth ganache mimics the flavours of a pb&j sandwich perfectly (minus the bread element)


We revisited the polycarbonate molds, and I really enjoyed the aesthetic of the Toucans (passion fruit ganache confections) that I chose to do that recipe again for the final.


We also did 30 dipped caramels. Using a slightly different recipe that uses all cream and no milk, giving the caramels a slightly deeper and creamier taste and texture.


And for packaging, we had to make 50 fudge products and I chose to revisit Penuche because of the superior taste quality I found in the brown sugar confection to a traditional chocolate fudge.

Monday, February 6, 2012

Soft Caramels

We did caramels two different ways. One is the recipe from the Peter Grewler book and the other version is from Chef Web's recipe. The second recipe produces a deeper, creamier caramel that is softer verses chewier. Both are very lovely, but depending on what characteristics you want from a caramel.


Formula: pg.
Yield: 60 pieces, this is a third of the batch and is a good amount for individual use

23%              Sugar                                                               226 g
47%              Whole milk                                                      453 g
                    Vanilla bean*                                                   1 bean
10%              Heavy cream                                                    93 g
Caramel slab
19%              Glucose syrup                                                   190 g
1%                Butter                                                              13 g
<1%              Salt                                                                  1/3 t

*if using vanilla bean paste use 1/2 oz. for a half recipe


MOP:
Combine sugar, milk, scraped vanilla bean and seeds (or paste), and heavy cream in a saucepan. Bring to a boil while stirring constantly. Add the glucose syrup and continue cooking to 110°C/230°F. Add the butter and continue cooking while stirring until mixture reaches 117°C/243°F, add the salt and remove from heat. If you used vanilla bean, remove the bean.

Pre coated caramel slab
Pour mixture into a sprayed parchment lined sheet pan, the mixture should only cover 1/3 of a quarter sheet pan. Let set up until firm at room temperature. 


Two common ways to prepare caramels is either wrapped in plastic or dipped in tempered chocolate. 

For the wrapped caramels, cut caramels down to 1" squares. Use wax paper or decorative plastic wrap and wrap caramels well, twisting both ends to secure.
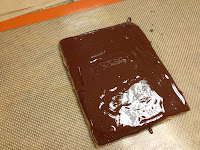
For the dipper caramels pre coat the uncut slab with tempered dark chocolate, let chocolate set up. Mark and cut the caramels to 1" squares. Dip squares into tempered dark chocolate and then garnish before letting caramels set up.

Caramels, un-dipped and wrapped

Right: just dipped caramels with ridges on it as simple decoration.

Penuche

This formula sometimes makes a really surprisingly delicious white fudge that can be crumbly if you over mix the fudge when agitating. 


Formula: pg.
Yield: 60 pieces, this is a half batch and is a good amount for individual use

23%              Sugar                                                              235 g
23%              Glucose syrup                                                  235 g
15%              Invert sugar                                                     155 g
8%                Heavy cream                                                    80 g
5%                Milk                                                                 50 g
10%              Chocolate liquor, melt                                      95 g
<1%              Salt                                                                 1/2 t
<1%              Vanilla extract                                                 5 g
10%              Fondant                                                           95 g
6%                Vanilla extract                                                 60


MOP:

Combine sugar, light brown sugar, glucose syrup, invert sugar, heavy cream, and milk in a saucepan. Cook to 118°C/245°F, stirring constantly. Stir in the salt. Pour hot mixture onto a marble slab, place the chocolate liquor, fondant, and vanilla extract on top of the syrup. Allow heat from syrup to melt the ingredients slightly, cool to 50°C/120°F. 

Dipped Penuche, garnished very
simply with fine line piping and
a penuche flake as a garnish
When the mixture has cooled, use a spackle tool or scraper to agitate the mixture until it turns creams and opaque. Similar to the Penuche technique, agitate for about 8 minutes. 

Deposit opaque mixture on a sprayed parchment lined half sheet pan, evenly. Let set up until firm, about 30 minutes. Cut into 1" squares, wrap to prevent drying if you are not dipping immediately. This confection works really well un-dipped but you need to wrap it to keep the Penuche moist.


Wrapped, un-dipped Penuche

Chocolate Fudge

This chocolate confection is made in a poly carbonate mold so the procedure for most of it is the same as the Toucan confection.
This formula sometimes makes a really soft fudge that is hard to cut without dipping in tempered chocolate. Something to keep in mind when deciding on the final application of the fudge.


Formula: pg.
Yield: 60 pieces, this is a half batch and is a good amount for individual use

41%              Sugar                                                              415 g
10%              Glucose syrup                                                   95 g
6%                Invert sugar                                                     60 g
6%                Heavy cream                                                    60 g
13%              Milk                                                                 130 g
9%                Chocolate liquor, melt                                      90 g
14%              Fondant                                                           150 g
1%                Vanilla extract                                                 1 t


MOP:
Combine sugar, glucose syrup, invert sugar, heavy cream, and milk in a saucepan. Cook to 115°C/239°F, stirring constantly. Pour hot mixture onto a marble slab, place the chocolate liquor, fondant, and vanilla extract on top of the syrup. Allow heat from syrup to melt the ingredients slightly, cool to 50°C/120°F. 

When the mixture has cooled, use a spackle tool or scraper to agitate the mixture until it turns creams and opaque. Similar to the Penuche technique, agitate for about 8 minutes. 

Deposit opaque mixture on a sprayed parchment lined half sheet pan, evenly. Let set up until firm, about 30 minutes. Cut into 1" squares, wrap to prevent drying if you are not dipping immediately.

Cherry Cordials, dipped

These tiny little confections are really quite delicious, and you could fill them with other kinds of liquor other then Brandy. The only thing to really know about this confection is that it takes patience to roll or dip the cherries in the melted fondant.


Formula: pg. 
Yield: 125 pieces

100%            Fondant (purchased),                                                  1000 g
                   Brandy, for thinning                                                    as needed
<1%              Invertase                                                                   1/2 t
                   Brandied cherries with/without stem                           125 cherries
                   Dark chocolate, tempered                                           as needed


MOP:
Heat the fondant over a water bath to 70°C/160°F. Thin the melted fondant with brandy until the fondant is thin enough for a cherry to be dipped into. Add the invertase, mixing thoroughly.

Hold the cherries by the stems, or if using stemless cherries I found that it was easy to put gloves on my hands and dip the cherries by hand, and dip into the hot fondant. Place the dipped cherry on a silpat, and let set until the fondant sets a little harder. If the fondant doesn't cover the cherry completely you can roll it by hand, which also heats the fondant up again bringing it to a clay like consistency.
Let the fondant set completely.

Dip the cherries in tempered chocolate by the stems, or if stemless with a dipping fork. Let set up on a silpat. Cherries can be stored at room temperature for 7-12 days. The longer the invertase sits, the more liquefied the fondant will become inside the dipped cherries. Ideally do not eat for a day or two.

Sunday, February 5, 2012

Pumpkin Caramel Ganache

This chocolate confection is made in a poly carbonate mold so the procedure for most of it is the same as the Toucan confection.
Formula: pg. 145
Yield: 125 keel-shaped molds, half recipe works well for individual use.

Cocoa butter,                                                                           as needed
Fat soluble colours,                                                                  as needed
Milk chocolate, tempered, for lining molds,                               as needed
Pumpkin Caramel Ganache
<1%              Lemon juice                                                              1/4 t
10%              Sugar                                                                        100 g
6%                Glucose syrup                                                            60 g
20%              Heavy cream                                                             200 g
10%              Pumpkin purée                                                          100 g
<1%              Gingerbread spice mix**                                             1 t
49%              Milk chocolate, pre-tempered*, chopped                      500 g
5%                Brandy                                                                       50 g
Milk chocolate, melted, tempered at 30° C/86° F, for sealing          as needed
*Store bought, and most commercially purchased chocolates are pre-tempered
** Gingerbread spice mix: 31% ground Cinnamon, 47% ground Ginger, 14% ground Nutmeg, 8% ground Cloves

MOP:
Example of improper buffing
Buff the polycarbonate mold that you are going to use. This recipe makes approximately 125 keel-shaped molds but you can choose any shape mold. Buff molds with melted cocoa butter. Make sure that you really press the cocoa butter in, or your finished chocolates will have a little white blur set into the shell. Set molds upside down or covered in plastic so that dust does not stick to your molds. Buffing preps the molds and the cocoa butter increases the shine on the finished chocolates.

Next make your filling. Rub lemon juice into the sugar, caramelize the sugar in a large saucepan until sugar has fully melted and caramelized. Remove from heat and add glucose syrup. In another sauce pan, heat heavy cream to a boil and add it to the caramelized sugar mixture over low heat, add purée and spice mix bring to a boil. Pour the hot liquid mixture over chopped milk chocolate and let sit for 60 seconds to melt the chocolate. Stir in to emulsify the chocolate and liquid mixture, if all the chocolate does not melt you can heat it over a double boiler just to aide melting. Stream in brandy, stirring until the mixture is homogenous. Cover mixture to the surface, and allow mixture to set up and thicken slightly for approximately an hour.

Buffed molds
Spray molds using melted cocoa butter and fat soluble colours. You should add enough melted cocoa butter to the powder colours to gain a thin, blood like consistency. Strain colours before spraying if it is too thick. You can use an airbrush for a very thin nice even covering, or you can brush or speckle the colour on with your brush for a more organic look. Clean the top of the mold off very well, scraping it off with your spackle.

Temper milk chocolate. Pour tempered chocolate into mold, this is going to be for creating a hollow sides and top to the finished confection. Use your spackle to bang the sides of the mold, releasing air bubbles that might be caught in each cavity. Clean off excess chocolate from the top and repeat banging if needed. When all the air bubbles have been knocked out, let the chocolate set up at room temperature for 2-3 minutes. The length of resting time will depend on how warm the room is and how cold the tempered chocolate was. If the temper ran on the colder side it will set up faster, if the temper is out of temperature it will throw the ganache-chocolate ratio off. At 75° with little humidity, it should take 3 minutes to set up. 

Flip the mold over and let the chocolate drip out of the cavities. This will leave a thin, about 1 mm, lip around each cavity. Knock the side of the mold to help the excess chocolate drip out. Clean off the top of the mold while still upside down to aide in getting all the wet chocolate out of the shells. Keep the mold turned upside down, and place it in the refrigerator for 5 minutes to let the chocolate harden. 

Finished chocolates in a larger
mold, has a good amount of
shine on the confections
Place the pumpkin caramel ganache into a piping bag. Take out the mold, you can use a hair dryer to gently heat up the edges of the cavities to aide in creating a better seal. Pipe ganache 3/4 of the way up each cavity. Try to keep the top level, you can try to tap the molds after piping to soften the tips that might have occurred during piping. Fill the top of the molds with tempered chocolate, scrape very cleanly any excess chocolate. If you get bits of ganache popping out through the chocolate, let the chocolate set up and pour another layer of chocolate over the mold. 

Let the molds set up in a refrigerator for 20 minutes. Turn the finished chocolates out on a parchment lined sheet pan. Tapping gently to release the chocolates from the molds.